Monday, January 17, 2011

Pottery Barn Butterfly Mobile


Yes......I am still working on Christina's room. With my luck I will probably finish the day before she is born.

But, I was going back and forth on whether or not I was going to do a traditional mobile that connects to the baby's crib. Or make something myself that shows a bit of creativity and of course me I choose the creativity.

I happened to come across this mobile at Pottery Barn Kids and absolutely fell in LOVE with it. But I was not going to shell out the $59 price tag that was on it. I mean I love PotteryBarn Kids but not that much. I am a secret penny pincher and I couldn't justify it so instead I chose to make it. Here's a quick (ok, not really quick, it's kind of a lot of steps but totally worth it) tutorial so you can make your own.


and here's Pottery Barn's.....


You'll need:


*1 Wire Wreath Base
*Punches of your choice (mine are the large & small monarch butterfly punch from Martha Stewart)


*Cardstock

*Fishing line (jewelry aisle)

*Pennies

*White spray paint

*Wreath doo-dads for decor (optional)

*Hot glue gun/sticks


1st step is to spray paint your wreath base white. Next start punching away! It's important to use a good cardstock paper (verses printer paper) so your punches will have some durability to them. It's hard to tell how many you'll need so I just punched a whole slew & then as I used them up I would punch more.

To assemble the top of the mobile tie 4 separate strings to the top of the mobile making sure they're evenly spaced apart. The length is really up to you, I cut super long pieces (around 2') at first & then trimmed them down later. Pull the 4 string together & make sure they're even by letting your wreath form dangle, it should hang evenly. If not adjust the strings accordingly. Once you get them right tie them in a knot at the top, then tie a loop with the extra string. This is what your mobile will hang by.


(I temporarily hang mine from my dinning room chandelier because it is easier to string the butterflies when they are higher up)


I hope you can see it, the light in the room was a little off.


Now time to string some butterflies. Take a 2' piece of line & knot it to the top of the mobile on on the of the rings, string on your butterflies by either weaving the line through the punch-made openings or another technique is same type of process as making a "stop bead" for you beaders out there. Basically, string the butterfly & then thread your line back up through where you came out of, when you tug down on it the butterfly should be secured into place.


Once you get to the end of your line you need to weigh them down so the string will not curl back up. To do that I traced the circumference of the penny on each color cardstock paper that I used and then cut them out. I attached one circle to each butterfly and used the hot glue to sandwich them together with the penny and the string in the middle.


I think the finished product looks best if you vary where, how many & what type of punches you use. Also attach your lines to the different wreath rings so some hang a little further back than others.


The last step is optional, I really liked how the one from PBKids had a bit of pink berry looking things at the top. I found some pearl flower decorations at Michaels on sale for $1 (they were trying to get rid of their Christmas flowers).


I also took a few leftover butterfly punches & hot glued them along the top of the mobile, if you bend their wings back a bit they look like they're perched right on top. Super cute in my opinion.


It seems as if Kat always finds a way to get into one of my crafting pictures.


and here is the finished product in the baby's room.


Wednesday, December 1, 2010

UPDATE: Advent Calendar

Hope all you guys had a food-filled Thanksgiving because I know I did. All of the tasty treats including my disaster Lemon meringue pie (which was soupy). All in all our trip to Luray, VA was wonderful.
(The annual Devanny, Belton and Leland football game)SOOOOO Funny


Well, guys it's December 1st and I am proud to say that my Advent calendar is done. Needless to say I finished it late last night. BUT IT IS DONE.

The girls were so excited the whole time I was sewing the calendar. Constantly asking me "Are you done, are you done." Well, just Courtney asking me that, Kat could care less what I was doing. She wanted to get her hands onto the scissors and cut into all of my felt and get into ALL of my glitter.
I did get tons finished over the Thanksgiving break, thanks to my AWESOME niece's and nephews and that Adorable baby Gabe who kept my children occupied.


During the drive to Luray I did get most of my ornaments done and sewed on most of the pockets there. My family better appreciate this calendar because my fingers are sooo sore from all of the threading. Here are the ornaments that will go into random pockets to go onto the tree.


Here is the finished product of all my hard work.


The stick that's holding my calendar is one from my tree in the back yard. A.C. Moore had a sale on the cutest glitter scrapbooking paper. So I HAD to get a couple of them.


All in all, I think this calendar turned out really good. I am so proud of myself.


Now that I have all the pockets filled with ornaments and candy, I can focus on other big projects like:


  • the floors on the main level

  • Baby Christina's room

Until next time.


Tuesday, November 23, 2010

Homemade Advent Calendar

I have to say we are embarking on one of my most favorite holidays.......Christmas.

Since I've been married we have had the most fun with our advent calendar. I really can't remember having one as a child. The last three years seeing Courtney wake up in the morning to open one of the perforated windows on the calendar makes me excited for some reason. But I do have to say our advent calendar has taken a beating the last couple years.
So I thought to myself.... I have all this time on my hands. Why not make a homemade advent calendar that Courtney, Kat and Christina (the little joy in the oven) could last us for years and years to come and any other children we might have in the future.


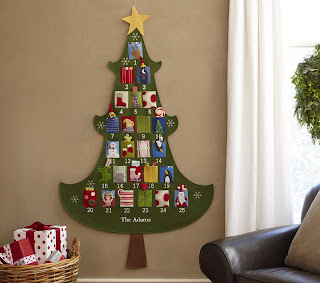
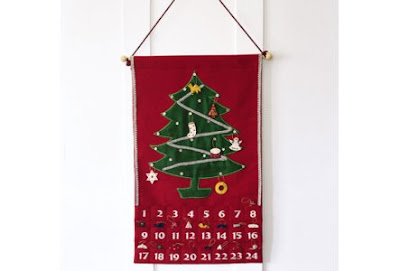
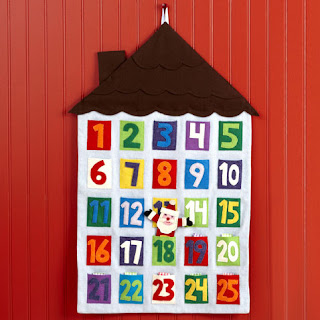
I started looking online because I was not sure how I should start my calendar. I came across these images and pulled bits and pieces from each.

(Pottery Barn Kids)


This is what I've gotten done so far


I have to say the worst part is over. Which was embroidering all those numbers on to the pockets. This calendar is going to be a combination candy and decorating. In no particular order half of the pockets will have some candy and the rest of the pockets will have little felt decorations to decorate the tree on top on the calendar. That's what the buttons are for on the tree.


I still have to attach the tree and pockets to the main part of the fabric and under each pocket their will be a bible reading to meditate on for the day. I am hoping to get all of this done over the Thanksgiving break. Between the long car ride and the all of the children to play with at my sister in-laws, I won't have to worry about the kids getting in the way. LOL


I am not the best at decorative stitching but I'm pretty sure after this project I'll be ready to go pro.


I will post the final picture before the 1st of December (hopefully).


Monday, November 22, 2010

Ribbon Board


When I was in Target the other day I saw the prettiest cork picture board to go into the girls room. But they wanted $25 for it (they have to be out of their minds) I will die before I spend $25 on a cork board. My genius child Courtney came up with a suggestion "Mommy, why not make one yourself?"

And so I did. I knew I had some old pictures in the basement that I was not doing anything with. So I used that for the frame and the base of the picture.


Here's what you'll need to make your own:

  • Lg enough piece of fabric to cover the frame back piece (8x10 etc..., I used an old skirt for fabric)
  • batting pieces large enough to cover frame insert

  • spool of ribbon(s)

  • glue gun


First off you need to discard the glass and/or any other cardboard that came with the picture. Only keep the outer cardboard that you see when you turn the picture around. Taking the back piece of the frame lay it down on top of a piece of batting. Starting on one side wrap the batting around the board tightly and hot glue into place.


****As you can see I can't Take a picture without my belly getting in the way***


Make a snip in the corners so you can lay them down smoothly. Continue repeating with other three corners and then do it again with the 2nd layer of batting. (I wanted mine to be nice and cushy but you can use less batting if you prefer)


Next you do the same with you piece of fabric. Making sure you pull on it tightly so their are no wrinkles in the front of your board.


For the corners make a snip so you can fold one side over the other.


Now, for the ribbon. I would suggest laying out the pieces first until you get a pattern you like. Then, you place hot glue on the ends of each ribbon pulling them tightly behind the board.


If you want you could use some coordinating fabric to cover the outside of the frame. But, I opted not to because I was tired and I thought it looked fine with the black frame.


Wah-lah, now I have my own version of the cork picture board that cost me hardly anything.


Trust me when I say I have stuff lying around my house I am not joking. You should see my basement where all of my crafting supplies are.


I am trying to finish the girls room. All I need to finish is the fabric self and picture frames for the room then I can concentrate on baby Chum-Chums room. I have less than three months left (I think I need to get started)


Friday, November 12, 2010

DIY Window Valance


I know what you may be thinking......I have to use a power drill, buy lumber, this will be a large project. But, I promise you this was THEE easiest project in the world and IT IS NOT HARD TO DO AT ALL.


Let me show you how I did it.

You are going to need:
Wood, plywood or pressed wood- 3 pieces that meet the measurements of your window, you'll want one long piece to go across the front and then two small pieces that are the same width as your long piece but only 3 to 4" long. They basically need to be long enough to make your valance stick out far enough from the wall for a curtain rod to fit underneath. Mine were 40" x 7" & 4" x 7"

Fabric & Batting- the length of the long piece of wood+side pieces
power drill, staple gun & a level

1st - You need to buy your wood. I know lots of women do not like going to the hardware store, it can be a bit intimidating. But, all you need to do is bring in the measurement for your window and mosie on over to the lumber section. Hopefully, you will be able to find an employee and once you do he can help you pick out the wood. The piece of wood that I got was only $6.28. Once the wood is picked out (wait...the best part of it all) THEY WILL CUT IT FOR YOU IN THE STORE. So that means no sawing for you, unless you are the type that does not mind using a saw.


2nd- Attach the two smaller pieces to each end of the large piece of wood. Use your corner bracket to hold them in place.


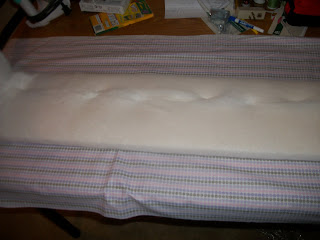
3rd- You can start to wrap your batting around the wood. I wrapped mine around twice to give it the extra cushion. Then do the same thing with the fabric. Be sure you pull on the batting and the fabric tightly so their are no wrinkles in the front of the valance.


4th- Use your level to make sure you are hanging your valance straight. Attach your L brackets to the wall first then to your valance. You want to hang it so that it covers the curtain brackets. If you look closely you can see my curtain brackets under there.


Then you are finish. You can rehang you window rod and panels under your new professional looking valance. Trust me this project is easy and cheaper than any new valance you would buy in the stores. I am all about designing on a dime.


Tuesday, October 26, 2010

Did Someone say "Candy Apples"


Oh yes I did....
I have been craving candy apples for sooo long and since I have an abundance of apples in my house I figured I would make some. I tried many recipes for candy apples in the past but this one I found on the Internet by FAR beat out all the other ones that I've tried. Also, it used the least amount of ingredients (everything one should have in their kitchen.

So I am going to be a good friend and share this recipe with you all. Because I am so loving and maybe you will have a much fun doing them with your children as much as I did with mine.

Ingredients
2c of granulated sugar
1/2c light corn syrup
3/4c water
3/4tsp of red food coloring
8 medium apples (I used a mixture of Granny Smith and delicious apples)
Candy thermometer


  1. First you need to wash and dry your apples so the candy will adhere to them.

  2. Next, insert your sticks into the apples. ( I used wooden dowels b/c they are a lot thicker than Popsicle sticks)
You also need to line a baking sheet with parchment paper and spray it with some Pam (baking ). That's so the candy apples will not stick to the sheet when they are done.


Making the Candy


  1. In a medium saucepan, put all of your ingredients together.

  2. Stir until the sugar has dissolved (Important- the sugar must be dissolved before it boils to prevent crystallization)


  3. When the liquid starts boiling reduce the heat to a simmer and if you notice the liquid starts to crystallize around the edges of the pan use a pastry brush with warm water to wipe it away.


  4. When the liquid reached 280 degrees F take it off of the heat.


  5. Then, you can start your dipping.

Okay, I had to take a picture of the girls eating them. I mean......you have to enjoy the fruits of your labor.


It was definitely bath time after they ate them. They were sooooooo sticky. But they were very delicious.


Hope you guys enjoy


Tuesday, October 12, 2010

Busy hands

Well, you guys I thought I could not do anymore until I came across an email from the good ole Martha Stewart. Talking about how relaxing crocheting can be. So I decided to take her up on that because God knows I need some relaxation in my life right now. I did not want to start with something really hard so I mosied on over to the beginners tab of the website and saw some really pretty Christmas stockings that I could crochet.

Let me tell you, crocheting is not easy at all.

So I called my mother, the Queen of crocheting and asked her to help me. Years ago she tried to get me into crocheting and my mind was going 110mph because I didn't understand the crocheting lingo. But, I have to say after LOTS and LOTS of reading the same thing over and over again. I finally got it (not all of it though).

It took me almost two weeks to finish one stocking. Now, that I have completed the second stocking I am feeling much better about crocheting.

Here is two of the four stocking that I am doing. It is not completely done yet, I still have to crochet the leaves and sew them on.


When I am finished them all I will show the pictures.